
- Ultimate Guide to Buying Your First Table Saw - June 4, 2025
- The Best Tool Brands – Are You Using the Right One? - May 30, 2025
- How to Build a Fire Pit in Just One Day - May 25, 2025
The Truth About Starting Woodworking That Nobody Tells You

Picture this: you’re standing in the wood aisle at Home Depot, completely overwhelmed by choices, holding a list of tools that seems longer than your grocery list. Sound familiar? Every new woodworker has been there, staring at boards and wondering if they’ve bitten off more than they can chew. Here’s the surprising truth – mistakes are part of the learning process. By being aware of these common pitfalls and taking steps to avoid them, you’ll improve your skills and enjoy your time in the shop even more. The difference between success and disaster isn’t perfection; it’s preparation and knowing what to expect. Most beginners think they need a garage full of expensive tools to get started, but that’s actually where many people go wrong. You can create beautiful, functional pieces with just a handful of basic tools and some patience.
Start With These Essential Tools (And Skip the Rest for Now)

For beginners, the right tools can make all the difference in learning the craft and achieving great results. With so many options available, it’s important to invest in versatile, easy-to-use tools that build your confidence and skills. Your first shopping list should include a circular saw, cordless drill, random orbital sander, measuring tape, and a set of clamps. That’s it – seriously. The circular saw is a vital tool for the beginner, budget shop. It can make cross cuts and rip cuts and it’s the best tool for breaking down large sheets of plywood. You can build easy jigs to make the circular saw even more versatile. Many beginners rush to buy a table saw first, but a circular saw is more affordable, portable, and safer to learn on. Add a quality tape measure that won’t flop over when you extend it, and you’re ready to tackle your first project. These tools will handle 90% of what you need to accomplish in your first year of woodworking.
The Most Common Beginner Mistakes (And How to Dodge Them)

Brace yourself for some sobering statistics: Every year, hospitals see injuries caused by woodworking tools in the emergency room. This includes professionals and hobbyists, students and homeowners. The types of injuries vary, as there are more ways to make mistakes in a woodshop than there are ways to plan ahead for them – precisely why they’re called accidents! But here’s the good news – most mistakes aren’t dangerous, just frustrating. Every skilled woodworker starts out as a beginner, struggling to cut a straight line. Here are 10 woodworking lessons you can learn here instead of the hard way. The biggest blunders include not measuring twice, using dull blades, and rushing through cuts. Accuracy is crucial in woodworking. Even a small mistake in measurement or marking can lead to significant issues later in the project. Take your time with measurements, mark everything clearly with a sharp pencil, and remember that wood glue doesn’t magically fix poor planning.
Your First Project Should Be This Simple Box

Simple boxes are the perfect place to start for the woodworking beginner. Building boxes will educate you in the basic forms and engineering, and give you the basic tools to tackle more complex projects later. A basic storage box teaches you everything: measuring, cutting, drilling, and assembly. I think a simple table makes the perfect beginner furniture project. All you need is a Kreg Jig and a power saw. You might even be able to get your boards cut up at the home store. That is exactly what I did for my first project. Start with a box about 12 inches square – big enough to be useful, small enough to finish in a weekend. Use pine boards from the hardware store, pre-cut to size if possible. This project will teach you how wood moves, how joints work, and how satisfying it feels to create something with your hands. The beauty is that even if you mess it up, you’ve only wasted about $20 in materials and gained valuable experience.
Safety First: Protecting Your Fingers and Your Future Projects
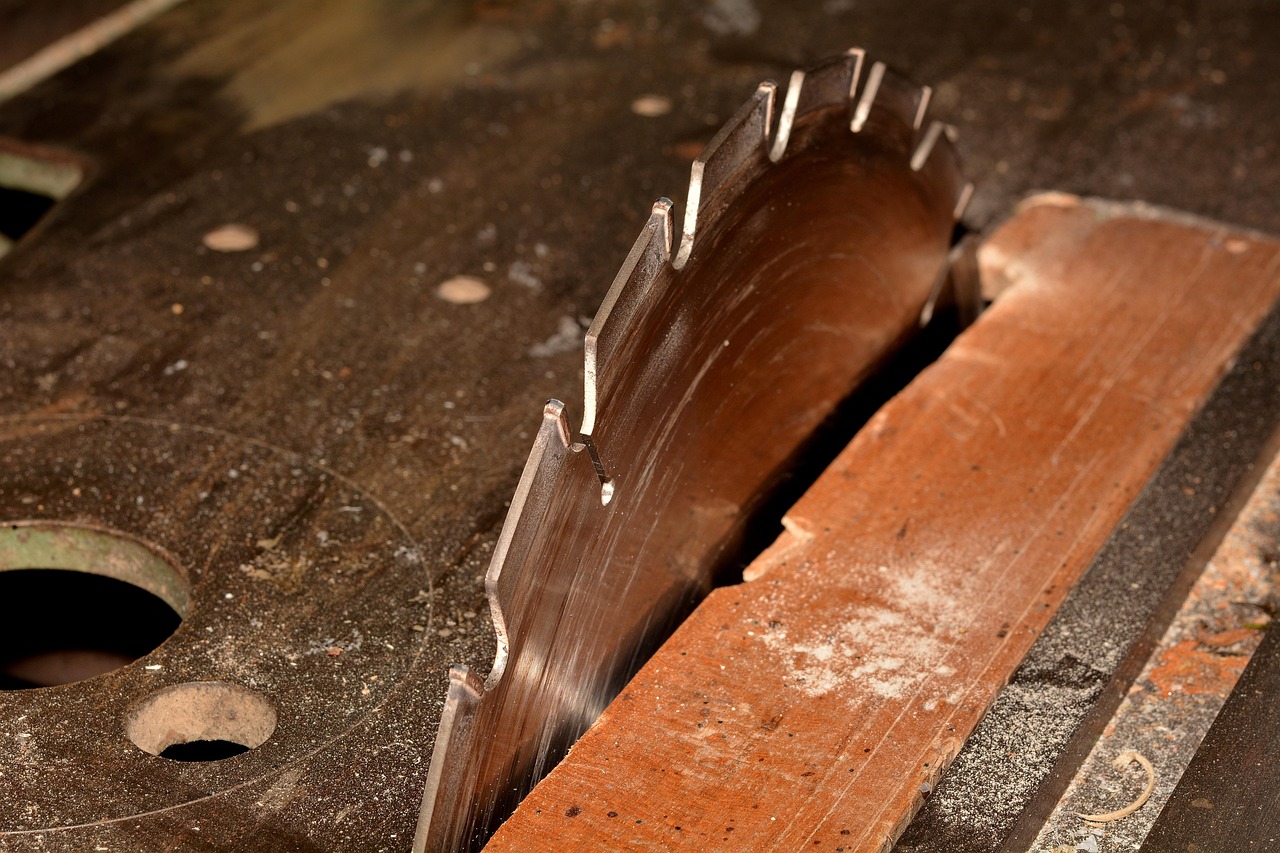
Let’s talk about the elephant in the room – safety. Table Saws: These tools, which are omnipresent in construction sites and woodshops, are responsible for the most number of injuries involving woodworking – 39,750 injuries annually. The National Institutes of Health also estimates that there are more than 30,000 table saw injuries in the U.S. annually. Fingers and hands are the body parts most frequently injured by table saws. The medical costs of treating injuries caused by table saws top $2 billion annually. But don’t let these numbers scare you away – they should educate you. Always wear safety glasses, keep your workspace clean, and never remove safety guards from power tools. Woodworking involves tools and materials that can be dangerous if not handled properly. Always wear appropriate safety gear, including safety glasses, hearing protection, and dust masks. Ensure your workspace is well-ventilated, especially when working with finishes or adhesives that emit fumes. The moment you get casual about safety is when accidents happen. Respect your tools, and they’ll serve you well for decades.
Understanding Wood Grain and How It Affects Your Project

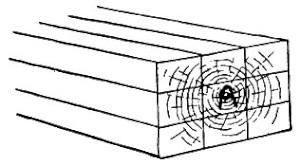
Wood isn’t just a building material – it’s a living thing that continues to move even after it’s cut. The direction of the wood grain significantly impacts the outcome of your project. Sanding or planning against the grain can cause unnecessary damage to the wood surface, leading to a rough and unprofessional finish. Always observe the direction of the grain and work with it, not against it. This will ensure a smoother finish and highlight the natural beauty of the wood. Think of wood grain like the flow of a river – you want to work with the current, not against it. When you sand, always go with the grain in long, smooth strokes. Leaving room for expansion and contraction is an important part of building science and furniture construction. When connecting wood items to an existing structure (the most common example is wood flooring into an existing house) this has to be an acclimation period before beginning work. If you’ll be doing multiple projects, you may consider investing in a moisture meter. If you don’t have a meter, a 48-hour window is usually plenty of time to allow wood to acclimate to a new environment. Let your wood adjust to your shop’s temperature and humidity before you start cutting – this simple step prevents warping and cracking later.
The Three-Cut Rule That Will Save Your Sanity
Here’s a professional secret that will transform your woodworking: never try to cut a piece to final size in one pass. There’s a million ways to get the same result in woodworking — but knowing the best way for a specific situation is key to avoiding mistakes. While the speed and efficiency of power tools is great, hand tools might be better for fine joinery that requires micro-precision. And if you’re using power tools, remember to take a few small passes instead of a single massive pass. It’s safer, and you’ll get better results. Cut your pieces about 1/4 inch longer than needed, then trim them to exact size. This approach gives you room to fix minor mistakes and ensures cleaner cuts. Your circular saw will thank you, your pieces will be more accurate, and you’ll avoid the heartbreak of cutting something too short. It sounds ironic, but your results will be more accurate if you set yourself up to measure as little as possible. Repeatability is the name of the game — and jigs are your best friends for making repeatable cuts. If you need four table legs to be the exact same length, find a way to measure only one leg and use it as a reference for the rest. For example, you can set up a stop block on your table saw, or line the legs up and cut them with a single pass of a track saw. Remember: you can always cut more off, but you can’t add wood back on.
Finishing Your Project (The Make-or-Break Moment)

You’ve cut all your pieces, assembled your project, and sanded everything smooth. Now comes the moment that separates amateur work from professional-looking results: the finish. We get it: it’s tough to keep a workshop sparkling clean. But for some jobs, the environment can be just as much of a factor as your craftsmanship. It can be extremely tempting to complete a woodworking project and immediately move to the finish stage. But if you’ve been running a saw, the surrounding air is filled with dust and debris. When you lay down a stain or finish, all that dust is going to settle and stick to the surface, marring your project and ruining the beauty of the wood. Clean your workspace thoroughly before applying any finish. One mistake beginners make during finishing is not accounting for raised grain. So, you’ve just sanded the wood smooth and gotten it the way you want it, but after the first coat of finish it has a really rough texture. Wood fibers react to liquid and stand up when they come in contact. Lightly sand between coats with fine-grit sandpaper to knock down any raised grain. This extra step makes the difference between a project that looks homemade and one that looks professionally crafted.
When Things Go Wrong (And They Will)

Because mistakes are an integral part of woodworking. Years back, I took a class with a master woodworker who told me he still makes major mistakes on every project — and a bunch of smaller ones along the way. That’s why I always say: the difference between a good woodworker and a great woodworker is knowing how to fix your mistakes. Drilling a hole in the wrong place isn’t the end of the world – it’s an opportunity to learn creative problem-solving. Cut something too short? Turn it into a different piece or use it as practice material. If the misalignment results in gaps, wood putty can be a valuable tool. While knowing how to fix common woodworking mistakes is essential, the best approach is to prevent these errors from occurring in the first place. By taking proactive steps and adhering to best practices, you can significantly reduce the likelihood of encountering issues during your woodworking projects. Wood putty, strategically placed clamps, and creative joinery can fix most problems. The key is not panicking when something goes wrong, but stepping back and thinking through your options.
Your first woodworking project doesn’t have to be perfect – it just has to be finished. Each mistake teaches you something valuable, and every successful cut builds your confidence. The most important tool in your shop isn’t your saw or drill; it’s your willingness to learn and keep trying. So what’s stopping you from getting started this weekend?